How to Edit DNS Settings in cPanel: A User’s Guide
Alright, folks, let’s get down to business and edit DNS Settings CPanel. With all our great UK Web Hosting Packages comes CPanel and editing the DNS settings in cPanel might sound like a task for a tech wizard, but trust me, you don’t need a magic wand – just a few clicks and a dash of confidence. Whether you’re trying to point your domain to a new host, set up email records, or just feel like a tech guru for the day, I’ve got you covered.
Step 1: Log into cPanel
First things first, you need to log into your cPanel account. Open up your web browser, type in your cPanel URL (it usually looks something like yourdomain.com/cpanel) OR if you’re using PlanetHippo Hosting you can Login Here, and enter your username and password. If you’ve forgotten your password, don’t worry – it happens to the best of us. Just use the password recovery option or contact your hosting provider.
Step 2: Find the DNS Zone Editor
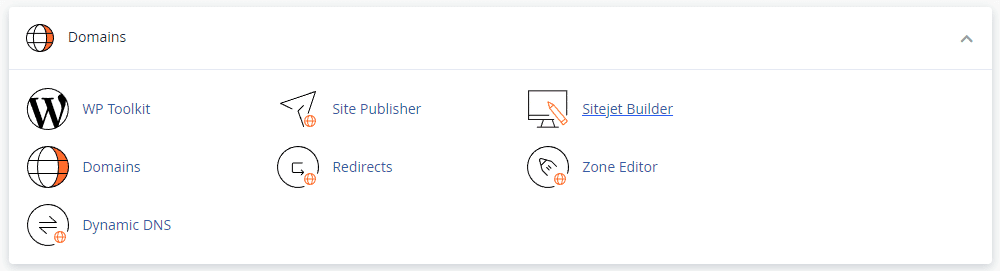
Once you’re in, you’ll see a dashboard that might look overwhelming at first glance. But fear not! Look for the “Domains” section. Here, you’ll find the “Zone Editor” or sometimes it’s just called “DNS Zone Editor”. Click on that, and you’re one step closer to DNS greatness.
Step 3: Choose Your Domain
In the Zone Editor, you’ll see a list of your domains. If you have more than one domain (fancy you!), choose the one you want to edit. Click on “Manage” next to the chosen domain.
Step 4: Add or Edit DNS Records
Now, this is where the magic happens. You’ll see a list of DNS records like A, CNAME, MX, TXT, etc. Each record has a specific purpose:
- A Record: Points your domain to an IP address.
- CNAME Record: Points your domain to another domain.
- MX Record: Directs email to your mail server.
- TXT Record: Verifies domain ownership and other uses.
To add a new record, click on “Add Record”, select the type of record you need, and fill in the details. For example, if you’re adding an A Record, you’ll enter the name (usually “@” for the root domain), TTL (time to live), and the IP address.
To edit an existing record, find the record in the list, click “Edit” next to it, make your changes, and then click “Save”. Easy peasy!
Step 5: Wait for Propagation
After making changes, it’s time to play the waiting game. DNS changes can take some time to propagate, meaning it can take anywhere from a few minutes to 48 hours for the changes to take effect globally. So, grab a cup of coffee, binge-watch your favourite show, and check back later to see your updates in action.
Wrapping It Up
And there you have it! Editing DNS settings in cPanel is not as daunting as it seems. With a few clicks, you’re in control of where your domain points, how your emails are routed, and more. Remember, with great power comes great responsibility – or at least, a bit more tech savvy.

